Tạo ứng dụng mẫu
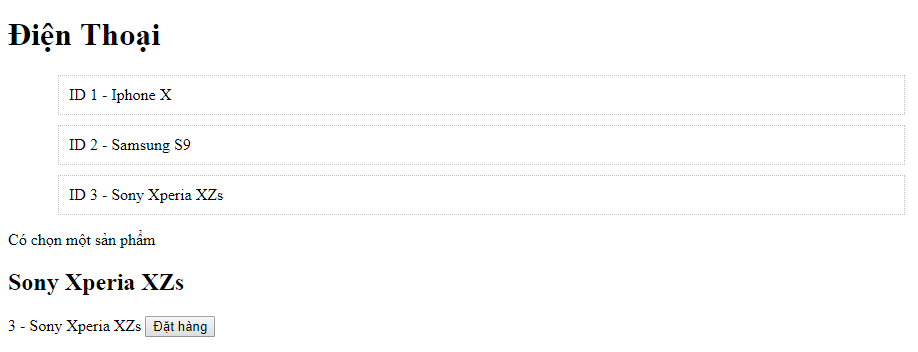
Trong ví dụ này áp dụng kiến thức phần Ứng dụng Angular đầu tiên và phần Component trong Angular để tạo một ứng dụng như sau - Hiện thị danh một danh sách sản phẩm, khi bấm chọn một trong danh sách đó thì hiện thị thông thi chi tiết (dùng một Component riêng chuyên việc này), ở khu vực chi tiết bấm vào nút đặt hàng thì Component cha sẽ nhận được thông tin và hiện thị thông tin.
Đặt tên ứng dụng là dienthoai, gõ lệnh để tạo bộ khung:
# ng new dienthoai
AppComponent định nghĩa trong app.component.ts sẽ dùng để hiện thị danh sách sản phẩm. Giờ tạo ra file data.products.ts định nghĩa lớp và danh sách sản phẩm như sau:
export class Product {
    id: number;
    nameproduct: string;
};

export var Products: Product[] = [
    { id: 1, nameproduct: 'Iphone X' },
    { id: 2, nameproduct: 'Samsung S9' },
    { id: 3, nameproduct: 'Sony Xperia XZs' },
  ];
Sửa lại app.component.ts để hiện thị danh sách sản phẩm trên như sau (chú ý sẽ sử dụng đến template (bỏ templateUrl)
import { Component } from '@angular/core';
import {Product, Products} from './data.products';

@Component({
  selector: 'app-root',
  template: `
    <h1>{{ title }}</h1>
    <ul>
      <li *ngFor="let p of products" class="product" (click)="setSelectProduct(p)">
          ID {{p.id}}  - {{p.nameproduct}}
      </li>
    </ul>
    <div *ngIf="selectedProduct">
      <p>Có chọn một sản phẩm</p>
    </div>
  `,
  styleUrls: ['./app.component.css']
})
export class AppComponent {
  products: Product[] = Products;
  title = 'Điện Thoại';
  selectedProduct?:Product;

  setSelectProduct(p:Product) {
    this.selectedProduct = p;
  }
}
Có thể thêm CSS vào app.component.css
.product {
    list-style: none;
    margin: 10px;
    padding: 10px;
    border: 1px dotted silver;
}
.product:hover {
    color: red;
    cursor: pointer;
}

Khi chạy bấm chọn vào mục nào thì nó sẽ thiết lập sản phẩm đó vào thuộc tính selectedProduct của Component AppComponent
Tạo Component hiện thị chi tiết
Giờ muốn có một Component chuyên hiện thị thông tin chi tiết sản phẩm chọn (selectedProduct), đặt tên là ProductDetail từ dòng lệnh gõ:
# ng generate component ProductDetail
import { Component, OnInit, Input, Output, EventEmitter } from '@angular/core';
import { Product } from '../data.products';

@Component({
  selector: 'app-product-detail',
  template: `
              <h2>{{titlebox}}</h2> {{product.id}} - {{product.nameproduct}}
              <button (click)="yeucaudathang()">Đặt hàng</button>
            `
})
export class ProductDetailComponent implements OnInit {
  @Input() product:Product;
  @Input('title') titlebox: string;

  yeucaudathang() {

  }

  constructor() { }

  ngOnInit() {
  }

}
Cơ chế truyền dữ liệu Component cha vào Component con bằng @Input
Component này hiện thị thông tin thuộc tính product của nó, và có dòng tiêu để titlebox,
product chính là sản phẩm chọn của Component cha AppComponent::selectedProduct ...
Nếu vậy cần khai báo thuộc tính product với decorator là @Input(), nghĩa là thuộc tính này
sẽ được Component cha thiết lập
@Input() product:Product, Component cha sẽ thiết lập bằng thuộc tínhproductthông qua thuộc tính HTML cùng tên trong HTML[product]@Input('title') titlebox: string, thuộc tínhtitleboxđược Component cha thiết lập thông qua thuộc tính HTML[title]
Trong Component này cũng thiết lập khi bấm vào nút thì gọi đến phương thức yeucaudathang()
Giờ trong app.component.ts (Component AppComponent), sử dụng như sau (Trong thẻ app-product-detail để ý xem Component cha đã truyền giá trị vào Compnent con như [product] = "selectedProduct"):
import { Component } from '@angular/core';
import {Product, Products} from './data.products';

@Component({
  selector: 'app-root',
  template: `
    <h1>{{ title }}</h1>
    <ul>
      <li *ngFor="let p of products" class="product" (click)="setSelectProduct(p)">
          ID {{p.id}}  - {{p.nameproduct}}
      </li>
    </ul>
    <div *ngIf="selectedProduct">
      <p>Có chọn một sản phẩm</p>
      <app-product-detail
            [product] = "selectedProduct"
            [title]="selectedProduct.nameproduct">
      </app-product-detail>
    </div>
  `,
  styleUrls: ['./app.component.css']
})
export class AppComponent {
  products: Product[] = Products;
  title = 'Điện Thoại';
  selectedProduct?:Product;
  mgs?:string;

  setSelectProduct(p:Product) {
    this.selectedProduct = p;
  }
}
Giờ chạy ứng dụng, chọn sản phẩm thì sản phẩm chọn sẽ truyền tử Component cha vào Component con
Cơ chế truyền dữ liệu Component con tới Component cha @Output
Ở đây khi bấm vào đặt hàng sẽ gọi đến phương thức yeucaudathang() của Compoent con, giờ muốn là khi bấm vào
đó thi thông tin cũng sẽ gửi tới Component cha. Nếu vậy, Component con sẽ cần phát đi một sự kiện, dữ liệu sẽ truyền
đi theo sự kiến đó để giúp cho Component cha có thể bắt được.
Component con sẽ định nghĩa sự kiện như sau: Đặt tên sự kiện là dathangEvent, tham số truyền đi là đối tượng Product, vậy sẽ khai báo như sau trong Component con
@Output() dathangEvent = new EventEmitter<Product>();
Đã có sự kiện rồi, khi nào muốn phát sự kiện đó thì gọi của sự kiện emit(), ta sẽ gọi nó trong phương thức yeucaudathang (tương ứng bấm vào nút) vậy Component sẽ như sau:
import { Component, OnInit, Input, Output, EventEmitter } from '@angular/core';
import { Product } from '../data.products';

@Component({
  selector: 'app-product-detail',
  template: `
              <h2>{{titlebox}}</h2> {{product.id}} - {{product.nameproduct}}
              <button (click)="yeucaudathang()">Đặt hàng</button>
            `
})
export class ProductDetailComponent implements OnInit {
  @Input() product:Product;
  @Input('title') titlebox: string;
  @Output() dathangEvent = new EventEmitter<Product>();

  yeucaudathang() {
    this.dathangEvent.emit(this.product);    //Phát sự kiện - có kèm dữ liệu this.product
    //console.log(this.product);
  }

  constructor() { }

  ngOnInit() {
  }

}
Như vậy, mỗi khi bấm vào nút Đặt hàng thì Component con đã phát ra sự kiện tên là dathangEvent,
Component cha muốn bắt được sự kiện chỉ việc lắng nghe - hãy xem ví dụ trước bắt sự kiện dathangEvent thì cũng tương tự như bắt sự kiện click, keyup ...
AppComponent sửa như sau:
import { Component } from '@angular/core';
import {Product, Products} from './data.products';

@Component({
  selector: 'app-root',
  template: `
    <h1>{{ title }}</h1>
    <em *ngIf="mgs">{{mgs}}</em>
    <ul>
      <li *ngFor="let p of products" class="product" (click)="setSelectProduct(p)">
          ID {{p.id}}  - {{p.nameproduct}}
      </li>
    </ul>
    <div *ngIf="selectedProduct">
      <p>Có chọn một sản phẩm</p>
      <app-product-detail
            [product] = "selectedProduct"
            [title]="selectedProduct.nameproduct"
            (dathangEvent)="notifyMessage($event)">
      </app-product-detail>
    </div>
  `,
  styleUrls: ['./app.component.css']
})
export class AppComponent {
  products: Product[] = Products;
  title = 'Điện Thoại';
  selectedProduct?:Product;
  mgs?:string;

  setSelectProduct(p:Product) {
    this.selectedProduct = p;
  }

  notifyMessage($event) {
    this.mgs = 'Có yêu cầu đặt hàng ' + $event.nameproduct;
  }

}
Đoạn code bắt sự kiện đó là (dathangEvent)="notifyMessage(\$event), vậy phương thức notifyMessage là Listener cửa Component cha, lắng nghe sự kiện dathangEvent gửi đến bởi Component con.
Chạy ứng dụng, bấm thử sẽ thấy thông báo! Điều này có nghĩa là Component cha đã nhận được dữ liệu gửi từ Component con.