Khai báo component trong Angular
Component là một lớp nó thường hiểu như là controller tương tác giao diện người dùng. Một component thường có 3 thành phần chính là code TypeScript, template HTML và CSS.
Để tạo Component nhanh chóng thì dùng decorator có tên là @Component với cú pháp như sau:
@Component({
  selector:    'your-selector',
  templateUrl: './file.component.html',
  providers:  [ ... ] //Khai báo các Service cần cho Component
})
export class HeroListComponent implements OnInit {
/* . . . */
}
decorator là một chức năng (hàm) để thêm các siêu dữ liệu (metadata), qua đó thêm thuộc tính, phương thức cho một lớp đã được định nghĩa trước. Các decorator của Angular có tiền tố là @ như: @Component, @NgModule, @Directive, @Injectable ...
selector
Định nghĩa một CSS selector mà Component sẽ chèn nội dung vào HTML. Nếu đặt tên như trên, thì sẽ chèn nội dung Component nếu gặp thẻ <your-selector></your-selector>, nếu muốn chỉ định như là một lớp CSS thì đặt tên ví dụ .your-selector thì nó có thể tìm đến phần tử <div class="your-selector"></div> để chèn nội dung Component
templateUrl
Chỉ ra file HTML làm template cho Component, nội dung File HTML này như là view của Component, nó chứa các phần tử HTML để hiện thị, nhập xuất dữ liệu ...
Bạn có thể không cần dùng đến templateUrl mà nội dung HTML nhập thẳng vào thuộc tính template
template
Thay vì nạp template từ file ngoài, thì toàn bộ nội dung template có thể nhập vào thuộc tính template, ví dụ:
@Component({
  template:    'nội dung HTML ở đây. {{data}}',
  ...
})
export class HeroListComponent implements OnInit {
/* . . . */
}
Ngoài thuộc tính selector, template, templateUrl nếu muốn chỉ ra file css thì dùng thuộc tính styleUrls, style
Component được nạp vào một Module và chèn vào các View bằng Selector nó định nghĩa. Trong phần Ứng dụng Angular đầu tiên,
thì ứng dụng đó có một Component là AppComponent, nó được nạp vào module và khởi chạy do thuộc
boostrap của Module này (xem file src/app/app.module.ts), riêng về Module sẽ nói ở phần
Module trong Angular, ở đây ta chỉ cần biết Component được một Module nạp và khởi chạy, ta xem thành phần của component AppComponent
AppComponent được khai báo tại src/app/app.component.ts
import { Component } from '@angular/core';

@Component({
  selector: 'app-root',
  templateUrl: './app.component.html',
  styleUrls: ['./app.component.css'],
})
export class AppComponent {
  title = 'Ứng dụng Angular Đầu tiên';
}
Component trên có selector đặt là app-root nghĩa là nội dung của Component sẽ chèn vào tại nơi khai báo thẻ <app-root></app-root>, bạn mở file index.html sẽ thấy chỗ có thẻ này!
templateUrl là app.component.html của là nội dùng file này sẽ là template (view template) của Component, nếu không thích để template ra một file thì không dùng templateUrl, mà nội dung HTMl đưa thẳng vào thuộc tính template, ví dụ:
import { Component } from '@angular/core';

@Component({
  selector: 'app-root',
  template: `
              <div style="text-align:center">
                <h1>
                    Welcome to {{ title }}!
                </h1>
              </div>`,
  styleUrls: ['./app.component.css'],
})
export class AppComponent {
  title = 'Ứng dụng Angular Đầu tiên';
}
Trong TypeScript để nhập chuỗi nhiều dòng trong code thì đặt chuỗi trong cặp ``
Lớp AppComponent được tạo với thuộc tính dữ liệu title (Ứng dụng Angular Đầu tiên),
dữ liệu này sẽ hiện thị trong template ở {{title}}
Ràng buộc dữ liệu giữa Component và Template
Đổ dữ liệu từ Component ra Template (DOM)
Sử dụng ký hiệu {{ datamember}}, với ký hiệu trên thì nó sẽ được thay thế bằng dữ liệu thuộc tính datamember của Component vào template, như trong ví dụ trên là {{ title }}
Ví dụ, trong lớp AppComponent cho thêm dữ liệu user, sau đó hiện thị dữ liệu cần thiets ra template
import { Component } from '@angular/core';

@Component({
  selector: 'app-root',
  //templateUrl: './app.component.html',
  template: `
  <div style="text-align:center">
    <h1>Welcome to {{ title }}!</h1>
  </div>
  <ul>
      <li>Họ tên: {{user.name}}</li>
      <li>Họ tên: {{user.addr}}</li>
  </ul>
  `,
  styleUrls: ['./app.component.css'],
})
export class AppComponent {
  title = 'Ứng dụng Angular Đầu tiên';
  user = {
    name: 'Abc',
    addr: 'Địa chỉ abc'
  }
}

Đổ dữ liệu từ Component ra thuộc tính DOM phần tử HTML
Dữ liệu của Component có thể đổ ra thuộc tính của phần tử HTMl với cú pháp khai báo thuộc tính phần tử HTML
<tag [thuoctinh]="datamember"></tag>
Như vậy thuộc tính thuoctinh sẽ được gán bằng dữ liệu thuộc tính datamember của Component, xem thêm
Thuộc tính phần tử HTML, có khá nhiều loại thuộc tính tùy thuộc vào loại phần tử HTML như: value, src, href, innerhtml, và các thuộc tính CSS thiết như style.color, style.background-color, các thuộc tính class.* ...
Ví dụ, phần tử input có value lấy từ Component
import { Component } from '@angular/core';

@Component({
  selector: 'app-root',
  //templateUrl: './app.component.html',
  template: `
  <div style="text-align:center">
    <h1>Welcome to {{ title }}!</h1>
  </div>
  <ul>
      <li>Họ tên: {{user.name}}</li>
      <li>Họ tên: {{user.addr}}</li>
  </ul>
  <input type="text" [value]="user.name">
  `,
  styleUrls: ['./app.component.css'],
})
export class AppComponent {
  title = 'Ứng dụng Angular Đầu tiên';
  user = {
    name: 'Abc',
    addr: 'Địa chỉ abc'
  }
}
Component bắt sự kiện DOM, đọc dữ liệu từ DOM
Trên các phần tử HTML DOM có thể xảy ra nhiều sự kiện, như bấm vào phần tử, thay đổi giá trị ..., để Component bắt được sự kiện thì dùng cú pháp như sau:
<input type="text" (keyup)="myFunction($event)">
Trong đó (keyup) cho biết là sự kiện bàn phím bấm một ký tự trên phần tử, myFunction
là một phương thức khai báo trong Component, nó có thể khai báo như sau:
myFunction(event: any) {
    var element: HTMLInputElement = event.target; // Lấy được phần tử DOM
    var val: string = element.value;              // Đọc các thuộc tính phần tử
}
Các sự kiện trên phần tử có nhiều (xem Sự kiện) tùy thuộc loại phần tử như: (submit), (keyup), click ...
Ví dụ:
import { Component } from '@angular/core';

@Component({
  selector: 'app-root',
  //templateUrl: './app.component.html',
  template: `
  <div style="text-align:center">
    <h1>Welcome to {{ title }}!</h1>
  </div>
  <ul>
      <li>Họ tên: {{user.name}}</li>
      <li>Họ tên: {{user.addr}}</li>
  </ul>
  <input type="text" [value]="user.name" (keyup)="keyupName($event)">
  `,
  styleUrls: ['./app.component.css'],
})
export class AppComponent {
  title = 'Ứng dụng Angular Đầu tiên';
  user = {
    name: 'Abc',
    addr: 'Địa chỉ abc'
  }
  keyupName(event: any) {
    var element: HTMLInputElement = event.target; // Lấy được phần tử DOM
    var val: string = element.value;              // Đọc các thuộc tính phần tử
    this.user.name = val;
  }
}
Chạy ứng dụng, mỗi khi nhập tên, Component sẽ nhận được ngay giá trị trong input

Đồng bộ dữ liệu hai chiều Component và DOM
Các phần tử trong FORM (có thuộc tính value) như phần tử input, select,
button thì Angular có cơ chế để binding dữ liệu hai chiều, thay đổi trên DOM câp nhật vào Component và ngược lại khi Component thay đổi cập nhật ra DOM.
Để làm điều đó, module phải có nạp FormsModule sửa trong app.module.ts
...
import { FormsModule } from '@angular/forms';
@NgModule({
  ...
  imports: [
    BrowserModule,FormsModule
  ],
  ...
})
export class AppModule { }
Sau đó trong template để thiết lập đồng bộ hai chiều cho phần tử form nào thì dùng cú pháp dạng:
<input type="text" [(ngModel)]="thuộc_tính_trong_Component">
Ví dụ:
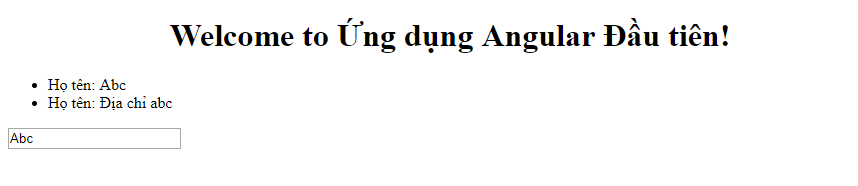
import { Component } from '@angular/core';

@Component({
  selector: 'app-root',
  //templateUrl: './app.component.html',
  template: `
  <div style="text-align:center">
    <h1>Welcome to {{ title }}!</h1>
  </div>
  <ul>
      <li>Họ tên: {{user.name}}</li>
      <li>Họ tên: {{user.addr}}</li>
  </ul>
  <input type="text" [(ngModel)]="user.name">
  `,
  styleUrls: ['./app.component.css'],
})
export class AppComponent {
  title = 'Ứng dụng Angular Đầu tiên';
  user = {
    name: 'Abc',
    addr: 'Địa chỉ abc'
  }
}
Một số cấu trúc trong Template
ngIf
Kiểm tra điều kiện *ngIf="", nếu đúng tạo phần tử, nếu sai thì không tạo phần tử. Thay đổi ví dụ trên:
<li *ngIf="user.name">Họ tên: {{user.name}}</li>
ngFor
Duyệt dữ liệu và tạo phần tử
<li *ngFor="let item of items">
  {{ item }}
</li>
Ví dụ trên, items là một dữ liệu tập hợp, mảng trong Component, duyệt qua từng phần tử của nó và tạo
ra phần tử li tương ứng
ngSwitch
Dẽ nhiều nhánh để tạo phần tử
<div [ngSwitch]="dayofweek">
  <p *ngSwitchCase="'0'">Chủ Nhật</p>
  <p *ngSwitchCase="'1'">Thứ Hai</p>
  <p *ngSwitchDefault>Không biết</p>
</div>
Kiểm tra xem thuộc tính dayofweek khai báo trong Component, bằng bao nhiêu thì tạo phần tử p tương ứng
Tạo nhanh Component từ dòng lệnh
Trở lại Ứng dụng đầu tiên Angular, nó
đang có một Component là AppComponent, với selector là app-root, template là app.component.html, do đó mà khi ứng dụng chạy tại ví trí có thẻ <app-root></app-root> trong file index.html sẽ là nơi chèn nội dung Component khi ứng dụng chạy!
Giờ sẽ tạo ra một Component nữa, đặt tên là ShowInfo, để nhanh chóng gõ lệnh ng sau:
ng generate component ShowInfo
Nó sẽ tạo ra một Component đặt toàn bộ trong thư mục /src/app/show-info: selector là app-show-info, template là show-info.component.html
Thêm Component này và
module AppModule
...
import { ShowInfoComponent} from './show-info/show-info.component'

@NgModule({
  declarations: [
    AppComponent,
    ShowInfoComponent,          //Nạp Component vào Module
  ],
  imports: [
    BrowserModule,
  ],
  providers: [],
  bootstrap: [AppComponent]
})
export class AppModule { }
Lúc này ở file template app.component.html chèn thêm thẻ <app-show-info></app-show-info>, thì đó là vị trí mà nội dung Component trên hiện thị, biên dịch và chạy thử để kiểm tra.